
Zend framework is an open source, object-oriented web application framework based on PHP5 and licensed under new BSD License. Zend framework provides support of the Model View Controller to its users. It is basically the collection of PHP-based packages.
In this tutorial, we will install Zend framework on our MacOS.
Following steps are used to install Zend framework on MacOS.
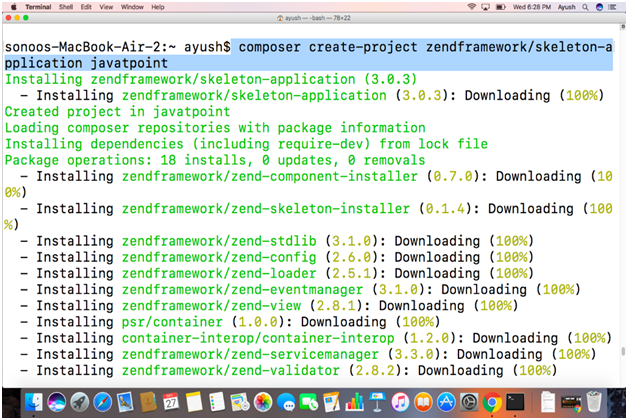
1) Install Zend:
Installing Zend on MacOS is a very easy task. This requires only a single command which will create a project directory (named JavaTpoint in my case) having Zend installed inside. Following command is used to do so.
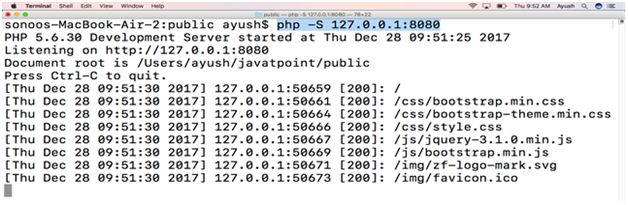
2) Start PHP development server:
When we install Zend framework using composer, we get a directory located inside our home directory which is installation directory of Zend. To access Zend on browser through localhost, we must start the PHP development server. First, we have to change our working directory to javatpoint/public by using following command:
Then we start the development server using following command.
Where 8080 is the port number on which, server will be listening.
3) Access Zend from localhost:
Type localhost:8080 in the browser's search bar, and we get the Welcome page of our newly installed Zend Framework.
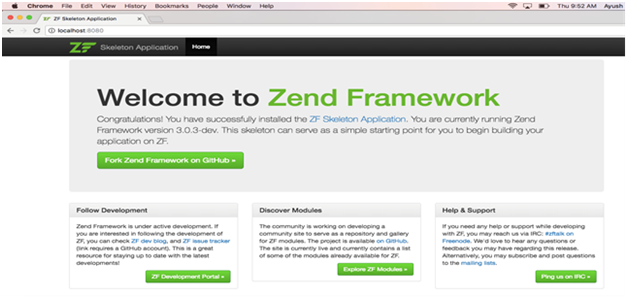
Hence, we have installed Zend framework on our MacOS successfully.